In the invoices list page, the following tabular data with the below-listed columns is displayed:
Invoice #: The number of the invoice is generated from Invoice settings automatically.
Client/Customer Name: The name of the client is reflected from Contact Management.
Payment Status: The current status of the invoice (Paid, Unpaid, Partial, Overdue)
Title: The name of the Invoice.
Invoice Status: Invoice status field allows the admin whether to Published/Draft the invoice to the customer. If the invoice status is published then it will be displayed in Customer’s panel and if the status is Draft it won’t be visible in the customer’s panel.
Invoice date: Date of the Invoice created.
Due Date: The date when the invoice expires and becomes overdue.
Amount: The total amount of the invoice.
After saving the invoices, all the invoices along with those created in the project management are also displayed in this list.
Click on View to redirect the Invoice to View page.
 Invoice View:
Invoice number is automatically generated by default and can be assigned manually as follows :
Global Settings–>Master Settings–>Invoice Settings.
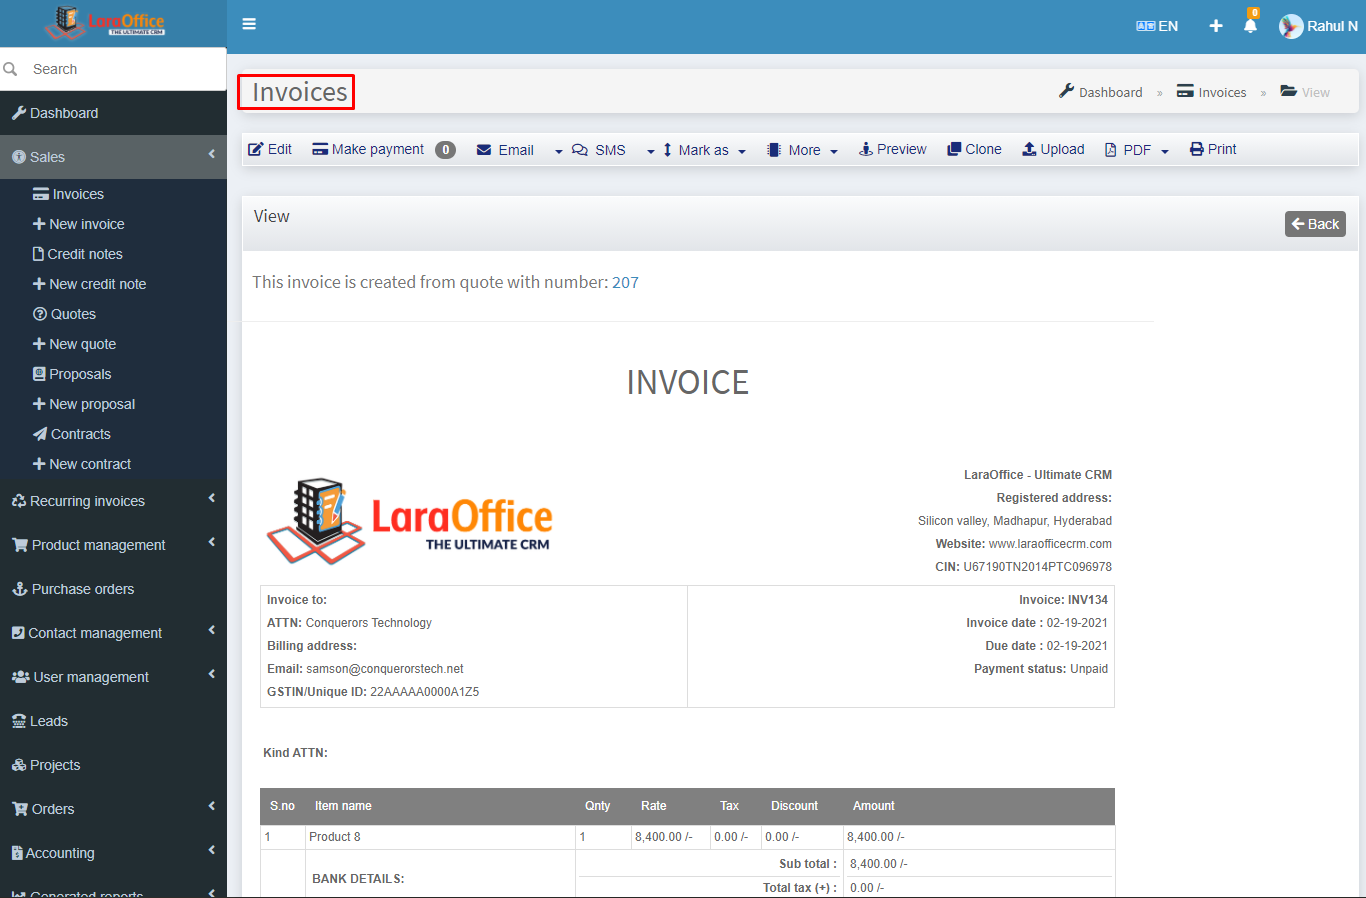
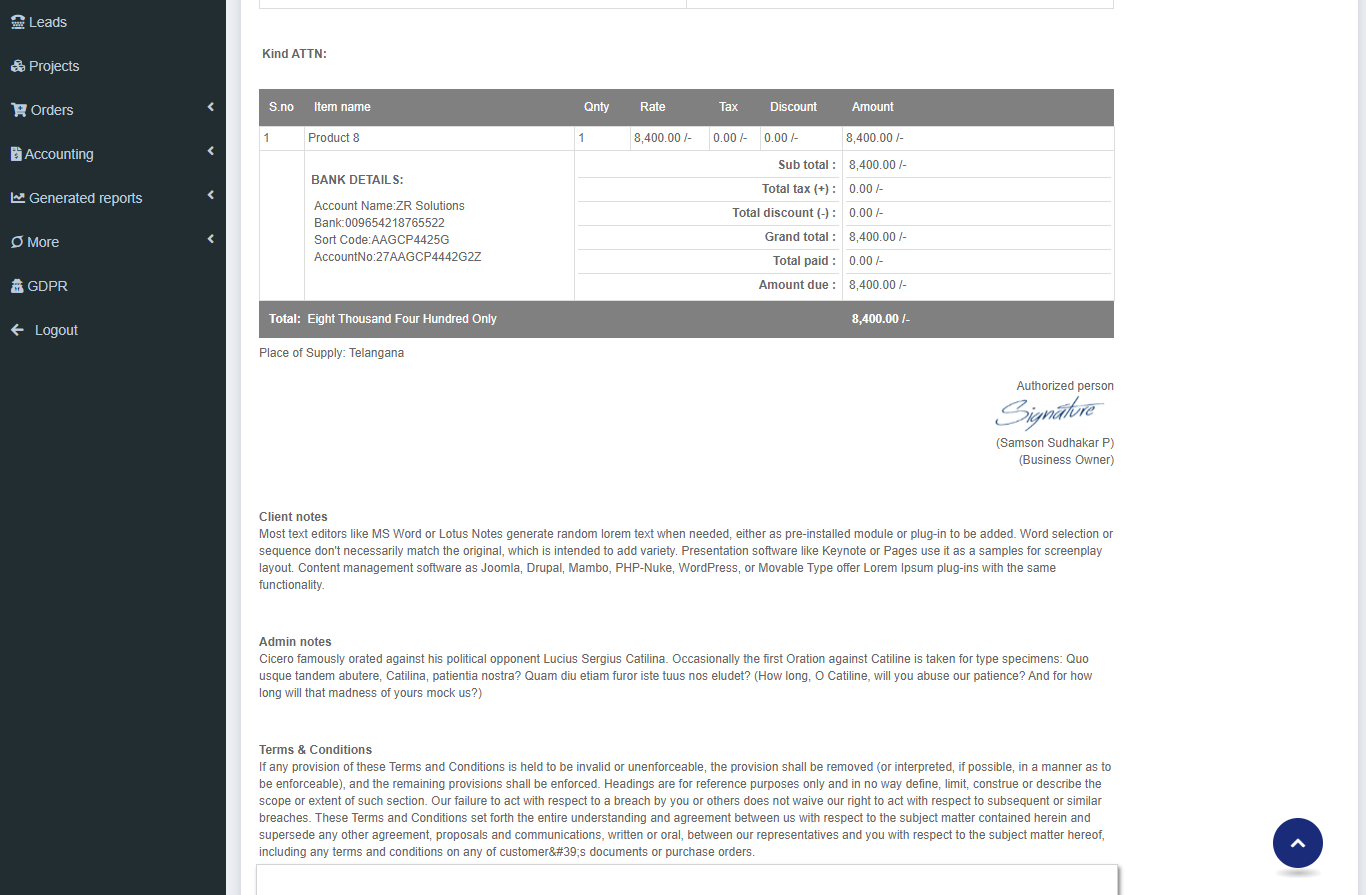 The Invoice Number, Payment status, Customer address, Invoice details, Payment method, Authorised signature and Transactions ( Pending, Success, Cancelled ) can be viewed in this page
The Client and Admin Notes, Terms & Conditions are displayed by default while creating the Invoice which are reflected from Invoice Settings.
 In order to get back the deleted invoices, click on the Restore button on the Trash page and they will be restored to the invoice list.
 (i) Edit button allows to edit the content of the Invoice.
 (iii) & (iv) Sending of EMAIL/SMS related to Invoice can be done by clicking on the Email/SMS buttons, which sends the status of Invoice through Email/SMS.
 (ix) Uploads: Files of specified formats can be attached to the invoice if required.
 (x) & (xi) PDF/Print: Admin can View/Download/Print the Invoice.
 The ‘+‘ icon symbol beside some fields allows you to directly add the particular’s through a Pop-up menu to their respective modules.to add directly from here to those respective modules.