Proposals:
They don’t have permission to access the Creation, deletion operations for Customer.
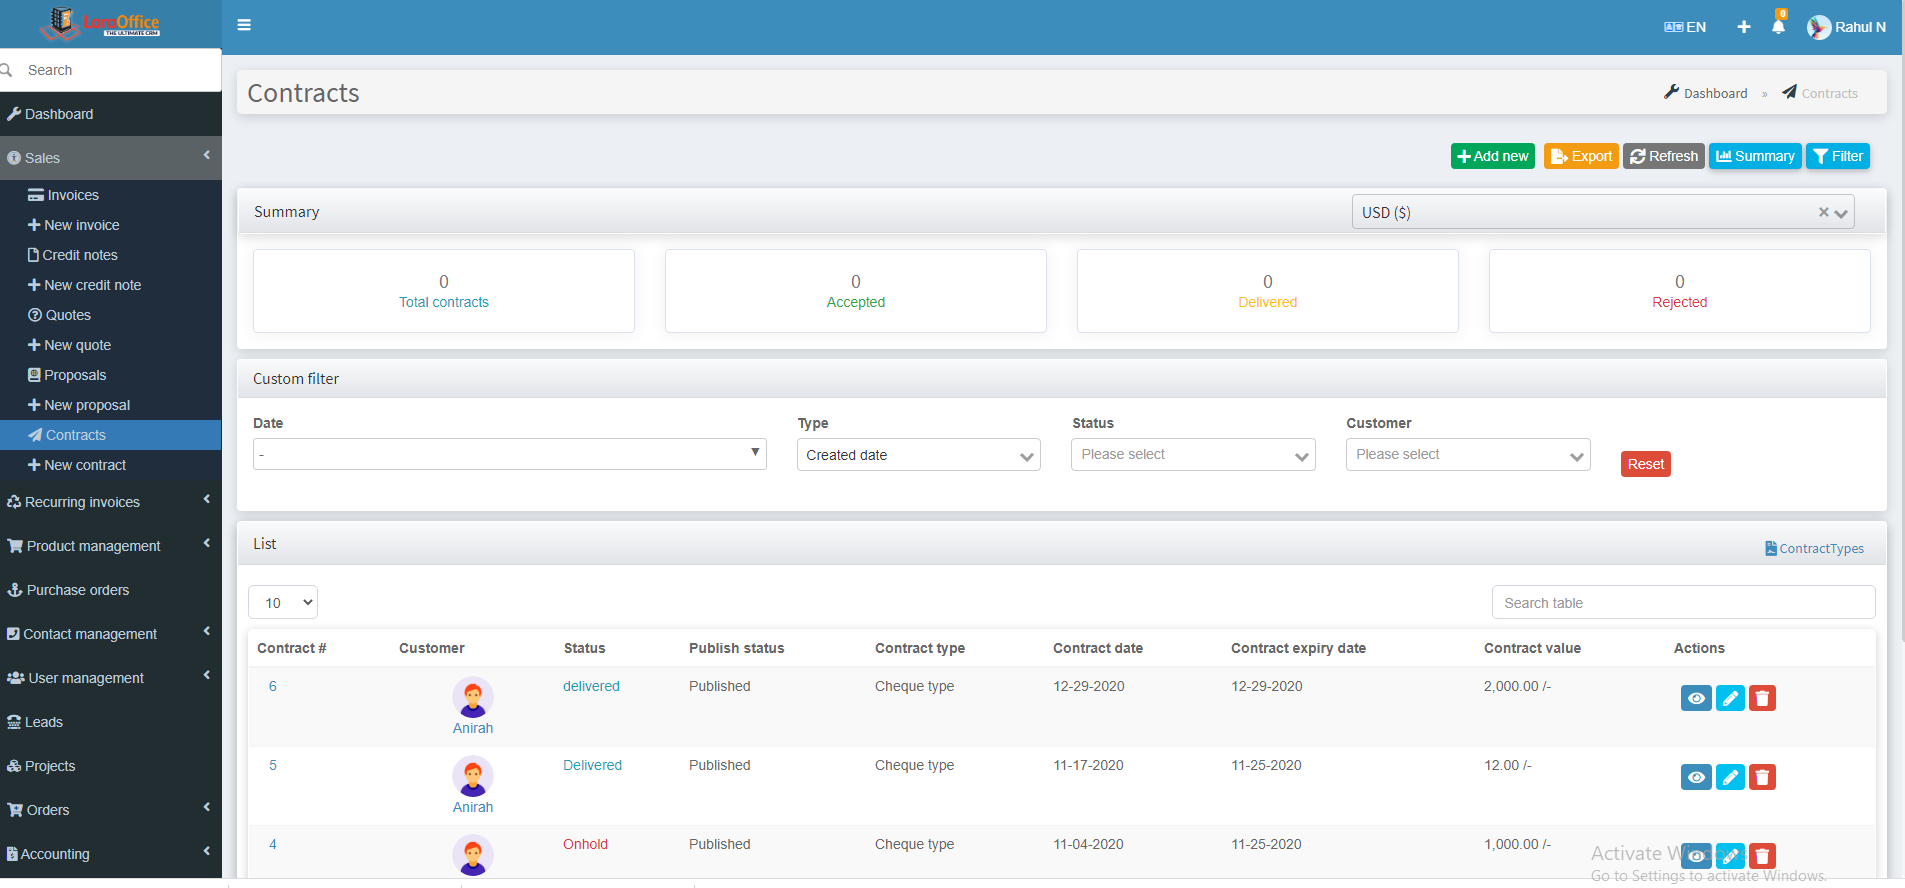
On the Proposals list page you’ll see a table with the columns below:
Proposal no #: The reference number of the proposal.
Client/Customer Name: The name of the client or customer.
Amount: The total amount of the proposal to be paid.
Proposal Status: The current status of the Proposal (Delivered, Accepted, Rejected, On-hold, Lost, Dead)
Title: The name of the Proposal.
Proposal Publish Status: Status of Proposals whether it is published/draft or not.
Proposal date: Date of the proposal to be created.
Due Date: The date of the payment is due.
After adding the proposal to the list, we can view all the proposals at a glance with respect to their fields which facilitate with quick search. Perhaps, These proposals are Converted to Invoice and quotes by naming with Invoiced and Quoted respectively.
Click on View that redirects the Proposals list to View page for a brief description of the proposal.

Proposal Summary:
In the Proposals page, we can find the Proposals Filter and Summary in order to know the complete details of all the existing Proposals.
The dashboard provides the information below:
Total Proposals : Total number of Proposal.
Accepted: Total number of Proposals Accepted.
Delivered: Total number of Proposal Delivered.
Rejected: Total number of Proposal Rejected.
By clicking on Accepted Proposal, Delivered proposal and Rejected Proposal are filtered and shows the status in the list with respect to their proposal.

Here, we have two types of Summaries like Progress and Circle. We can Filter the Proposal by searching with manual entry.
Proposal View:

We observe the following attributes in the proposal view:
Proposal Number: The reference number of the proposal.
Proposal status: It shows the status of the proposal to be accepted/Rejected/Delivered.
Customer address: The details of the customer’s address.
Proposal details: It shows the proposal date, proposal expiry date, sale agent and grand
Authorized signature: The Signature of Authority.
Add New Proposal:
To Add new proposal go to Sales -> Proposals and Click on the button Add new proposal.

The Proposal Creation page is showing as follows:
Customer: Click on the Customer field. Select the relevant Customer from the Customer list.
Currency: Proposal currency. If you select a customer’s default currency, the selected customer’s currency will be used. Otherwise, we can change the currency as we need.
Proposal Status: Status of proposal whether it is sent/draft or not.
Sale Agent: Click on the Sale agent field. Select the relevant Sale agent from the Sale agent’s list.
Address and Delivery Address: Proposal should be delivered to which address.
Title: Proposal Title. Eg: Silver steels.
Proposal Prefix/Quantity: These will show default from Proposal Settings.
Proposal No: Auto assigned proposal number.
Reference: Reference number of Proposal.

- Item/Product: The product name can be either manually typed or picked from the listed options.
- Quantity: The number of units being charged.
- Unit Price: The amount you charge per unit of the items/products.
- Tax Rate: It can be applied to the product by selecting the relevant tax from the drop-down list.
- Discount: It can be applied to any particular item either as a percentage or a fixed value.
- Description: Additional information about the item/product. This will help the customer to understand the product’s features in a better way.

The ‘+‘ icon symbol beside some fields allows you to directly add the particular’s through a Pop-up menu to their respective modules.to add directly from here to those respective modules.
The Client and Admin Notes, Terms & Conditions are default shown while creating the Proposal. These are placing from Proposal Settings.
Proposal Actions:
These are actions that can be performed on the particular proposal to make changes/view as per the requirements.
(i) Edit
(ii)Email
(iii) SMS
(iv) Mark As
(v)Convert to
(vi) More
(vii) Preview
(viii) Clone
(ix) Upload
(x) PDF
(xi) Print
We have common features when compared with Invoices and quotes so go through Invoice/Quotes View page to know respective details.
(i) Edit button allows to edit the content of the proposal.
(ii) & (iii) Sending of EMAIL/SMS related to Invoice can be done by clicking on the Email/SMS buttons, which sends the status of Invoice through Email/SMS.
(iv) Mark As:
Status of a payment such as,
- Paid
- Unpaid
- Partially Paid
- Cancelled can be managed manually in this field as per the admin.
(v)Convert to Invoice: The Proposal will converts to Invoice and make the payment.

(vi) More: We can create New Task, Reminder and Notes about the respective invoice to follow them until the payment has done from Customer.
- Task: The process of assigning tasks to a recurring invoice which are integrated between product and customer.
- Reminder: It helps admin to keep track of customer’s payments, Interests, and Purchases to remind the customer by Employee about the due payments, new arrivals, etc.
- Notes: Notes related to particular Invoice.
(vii) Preview: Basic view of Invoice before confirming the action.
(viii) Clone: To create a duplicate for the invoice.
(ix) Uploads: Files of specified formats can be attached to the invoice if required.
(x) & (xi) PDF/Print: Admin can View/Download/Print the Invoice.
After Converting Proposal to Invoice, then click on View we can easily notice that the Proposal is converted by showing the following details.

Similarly, After Converting Proposal to Quote, then click on View we can easily notice that the Proposal is converted by showing the following details.

The following screenshots describe the conversion of the proposal into quotations.


 Contract Summary:
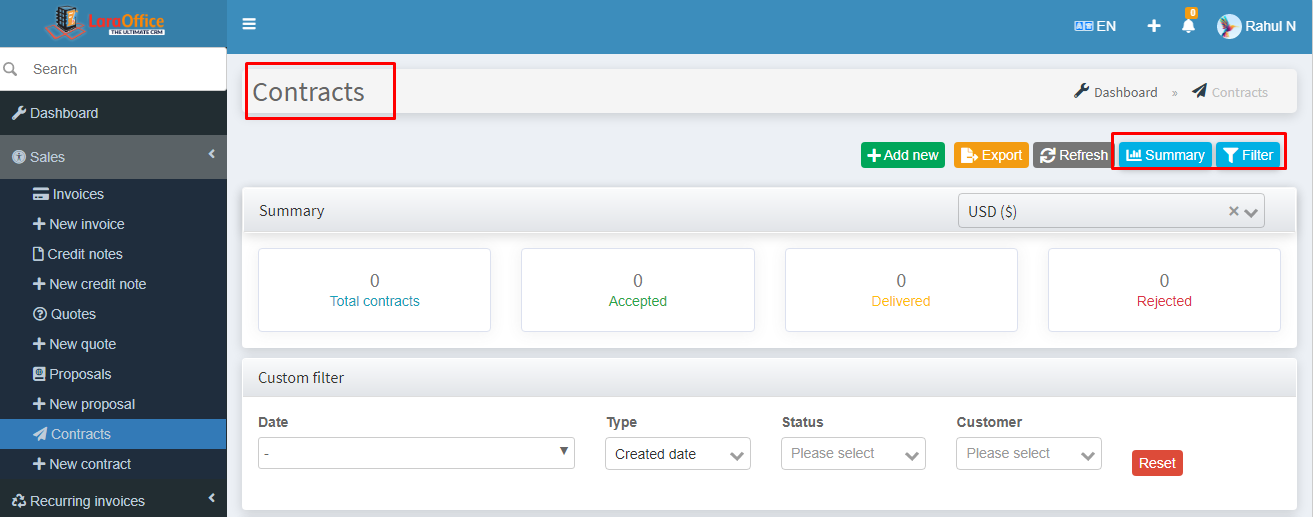 For here also we have two types of Summaries like Progress and Circle. We can Filter the Proposal by searching with manual entry.
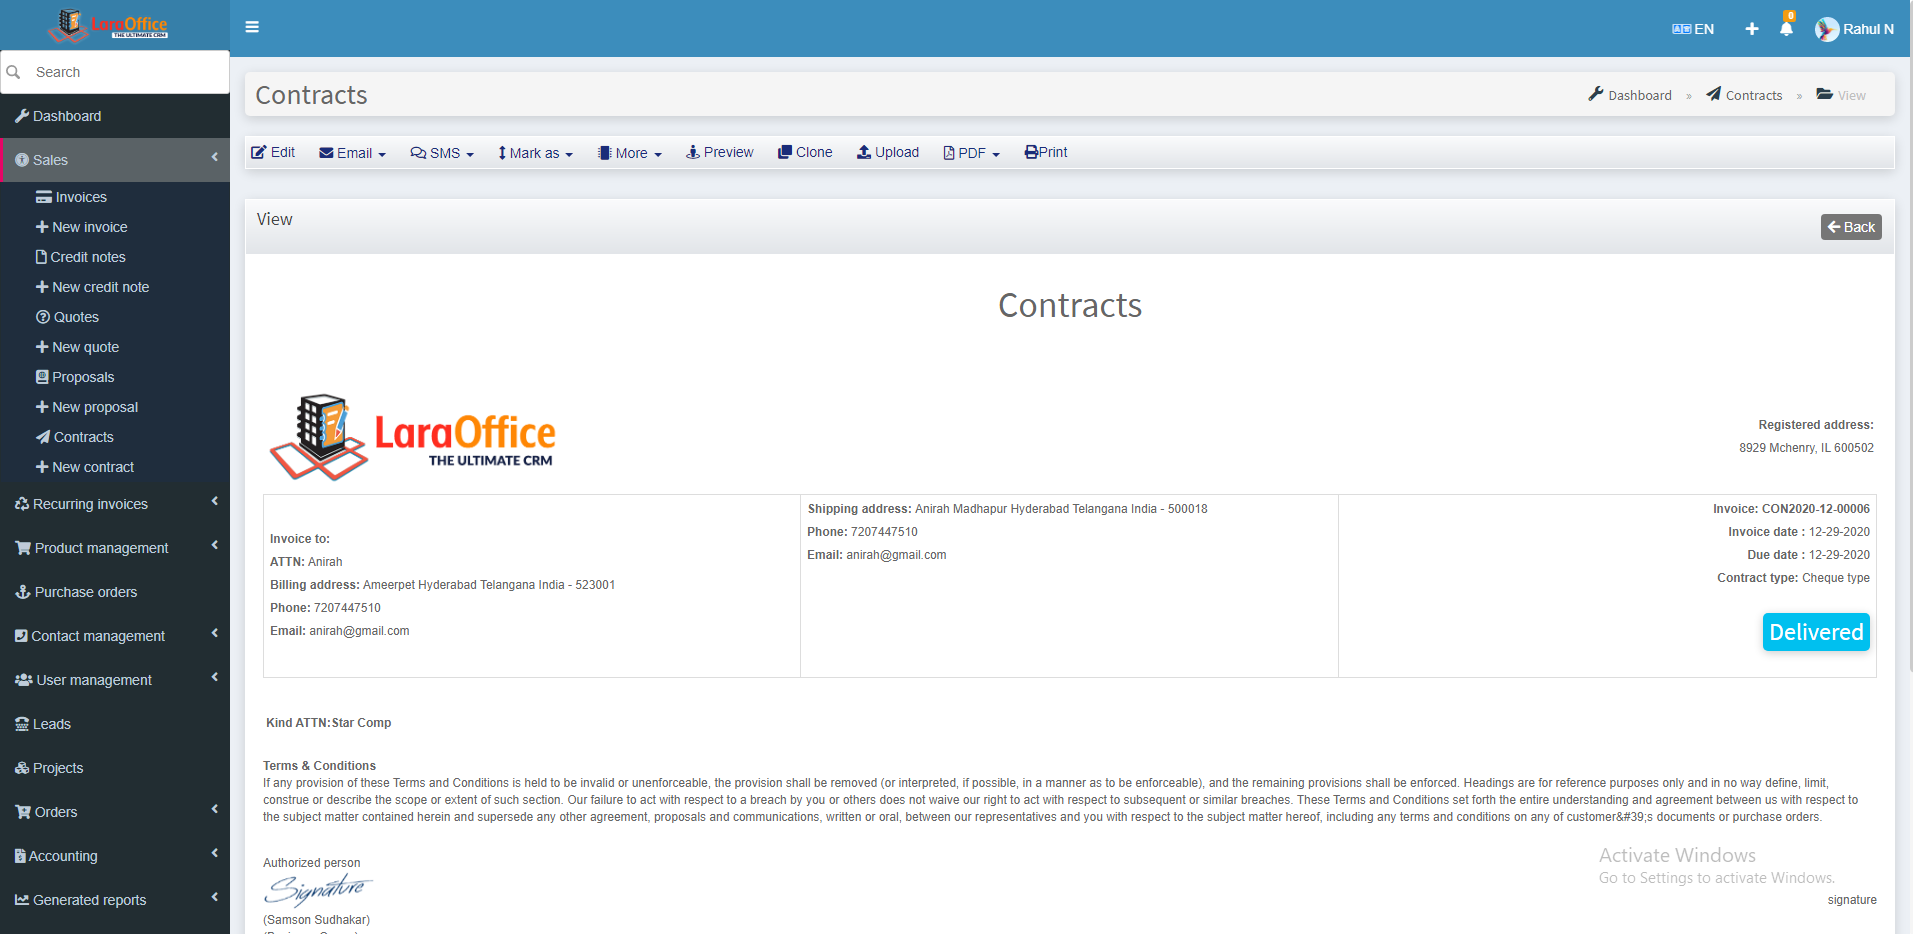 Here we can view the contract Number, contract status, Customer address, contract details, Authorised signature.
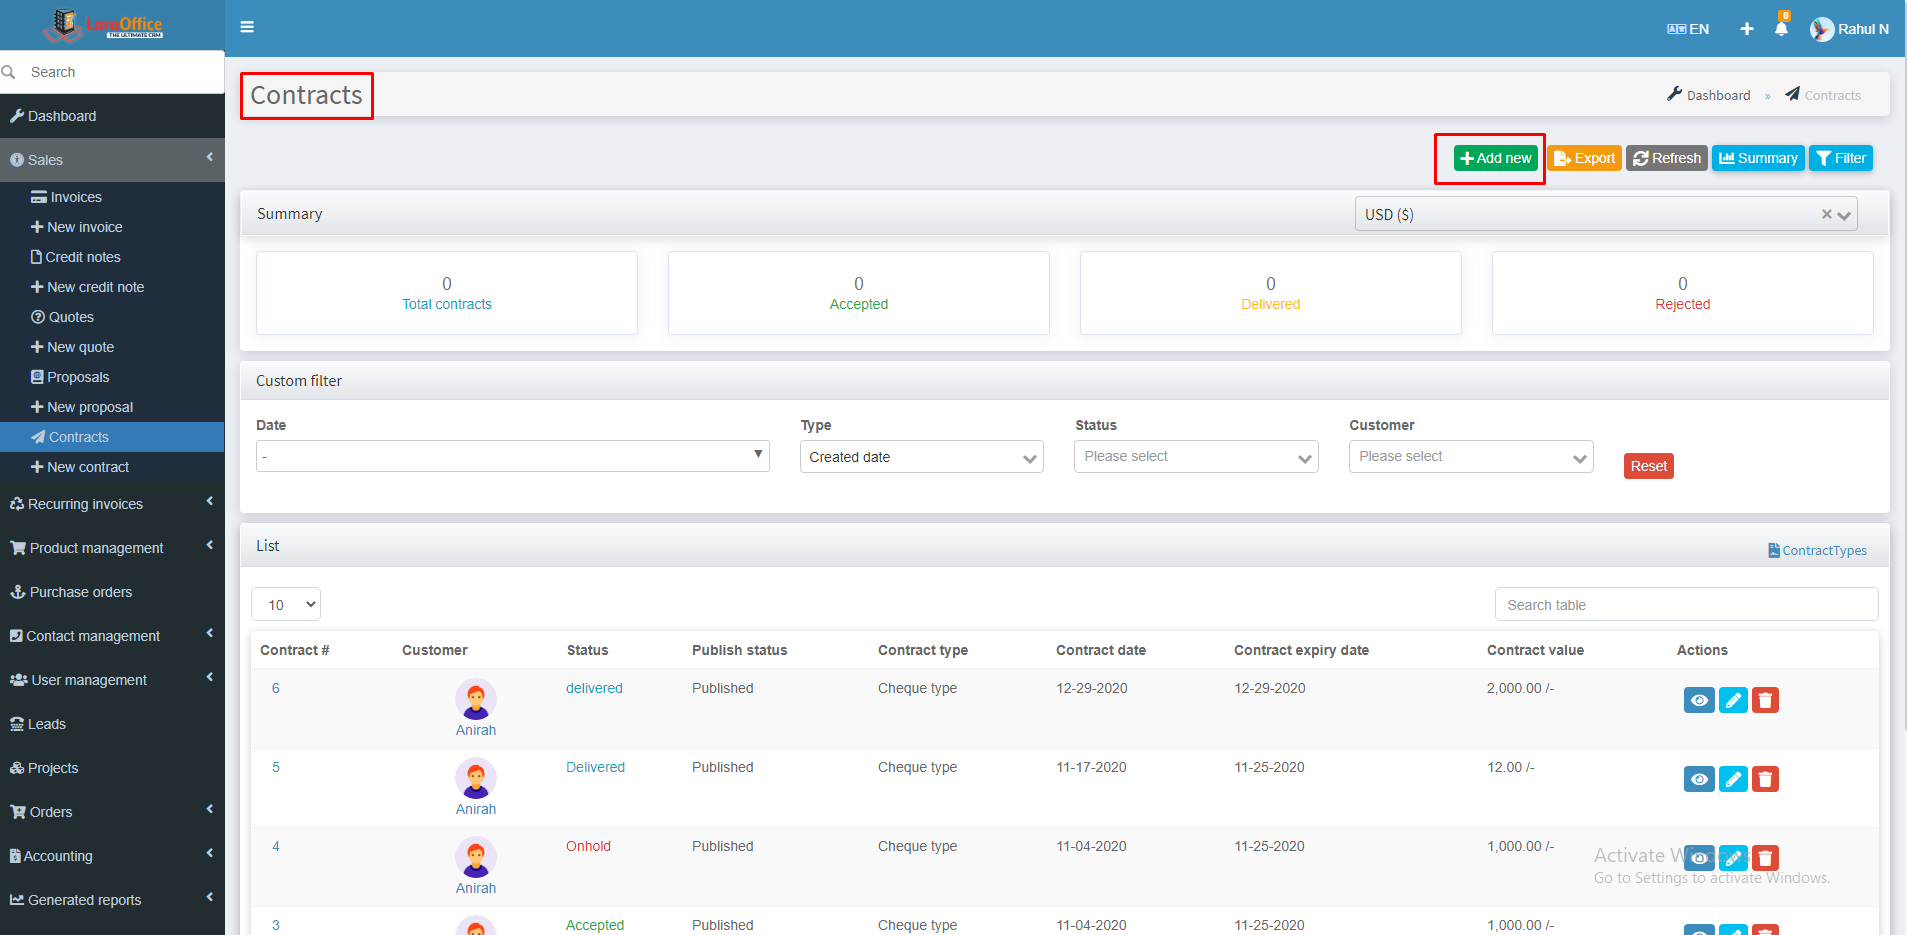 The contract Creation page is shows as follows:
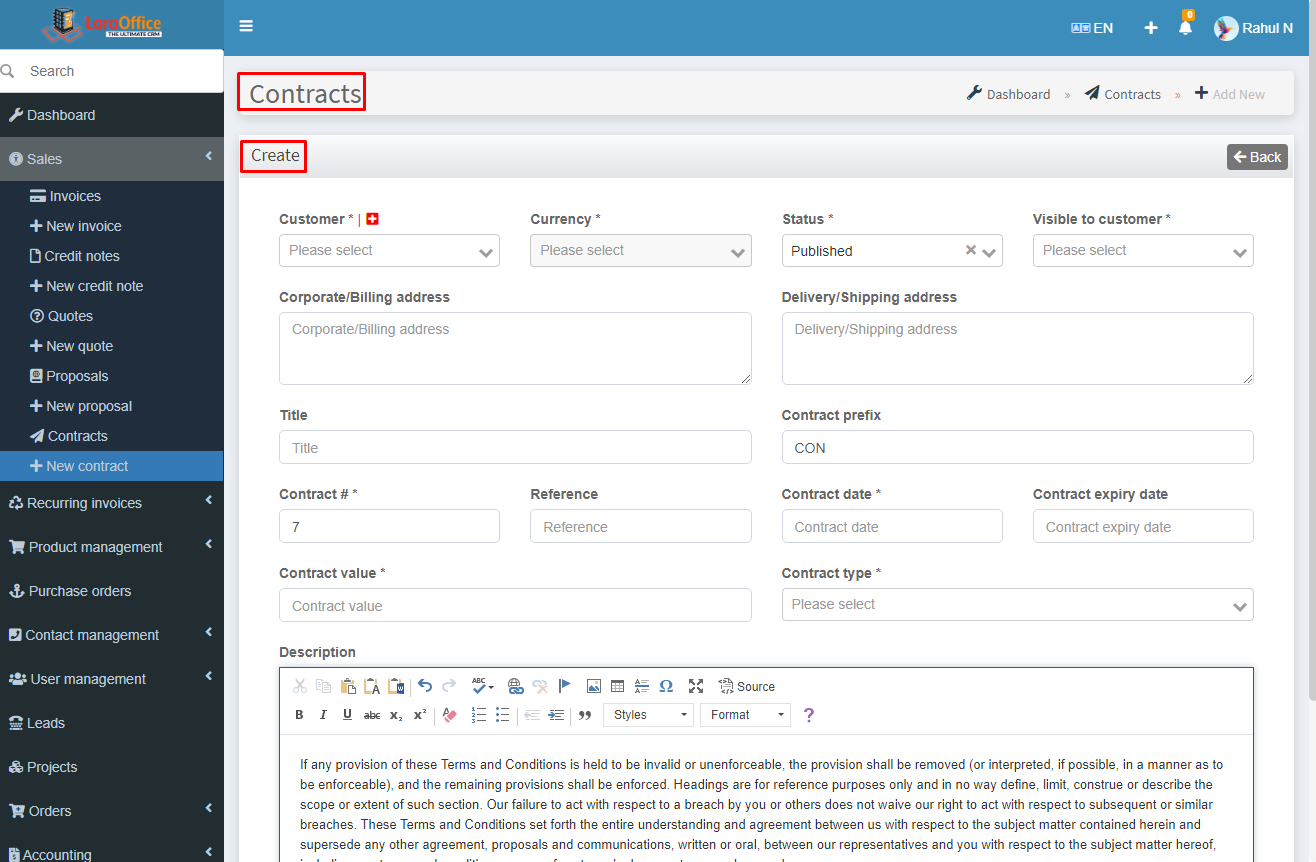 For some fields, we have + icon symbol for to add directly from here to those respective modules.
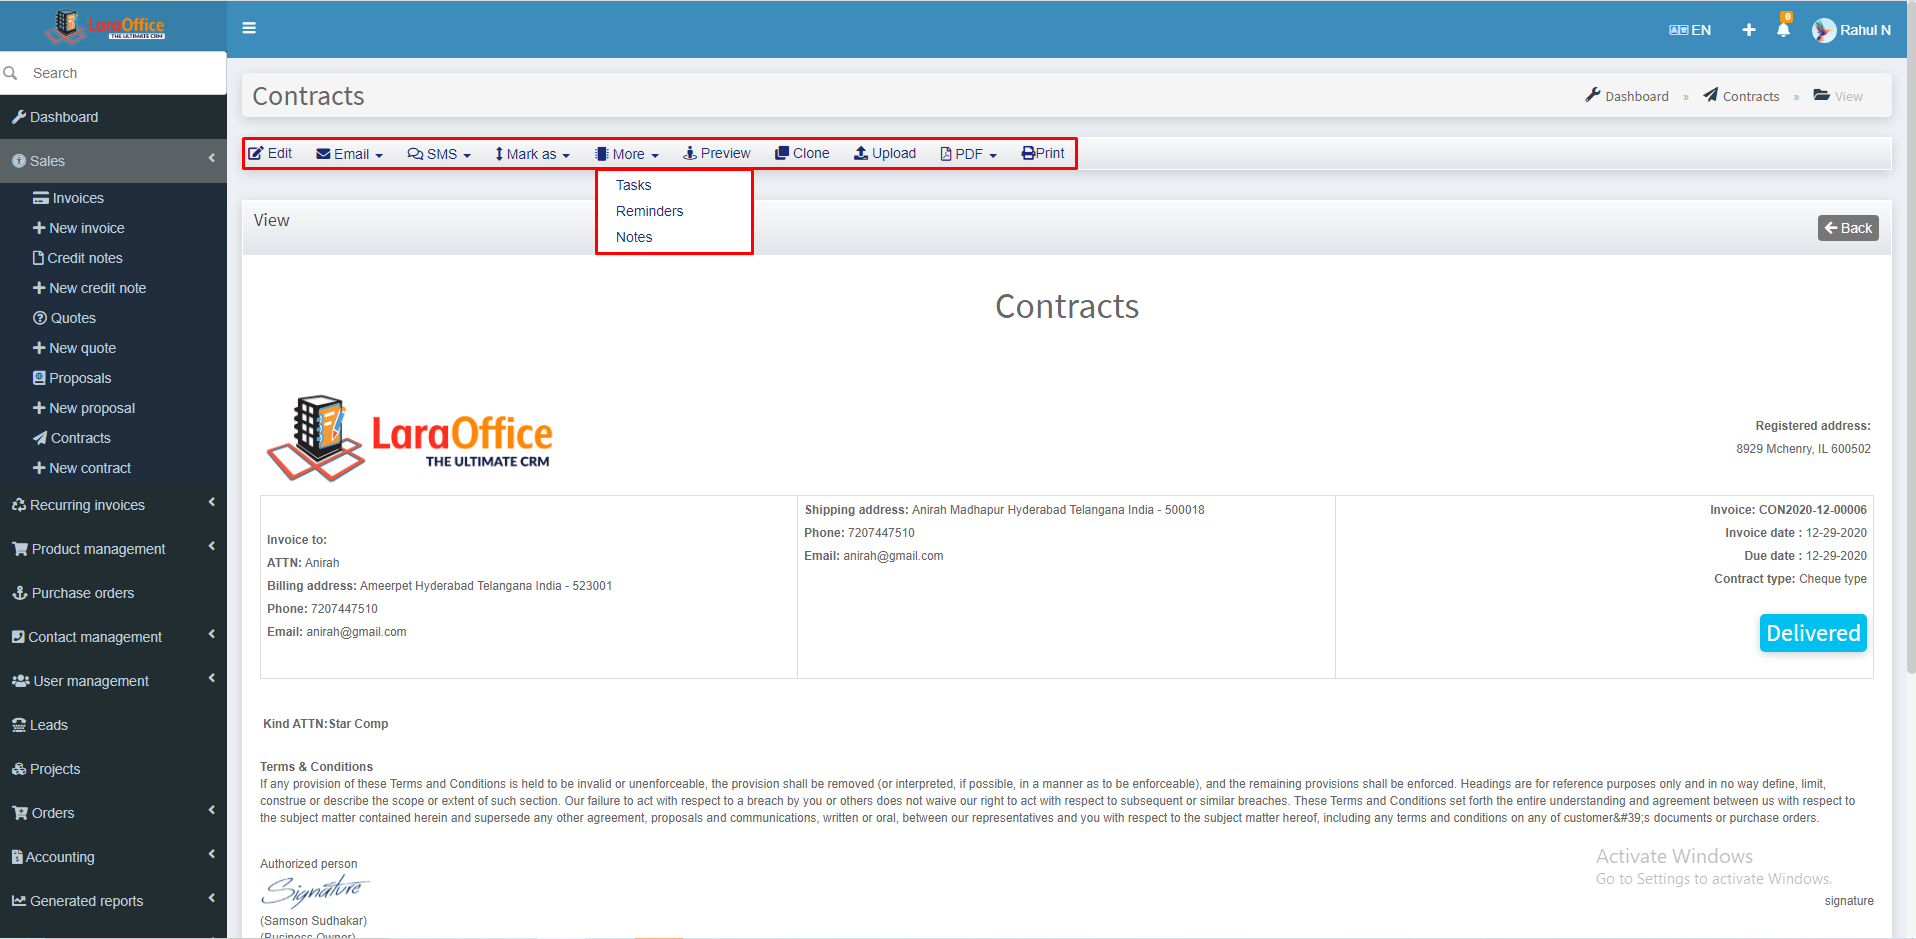
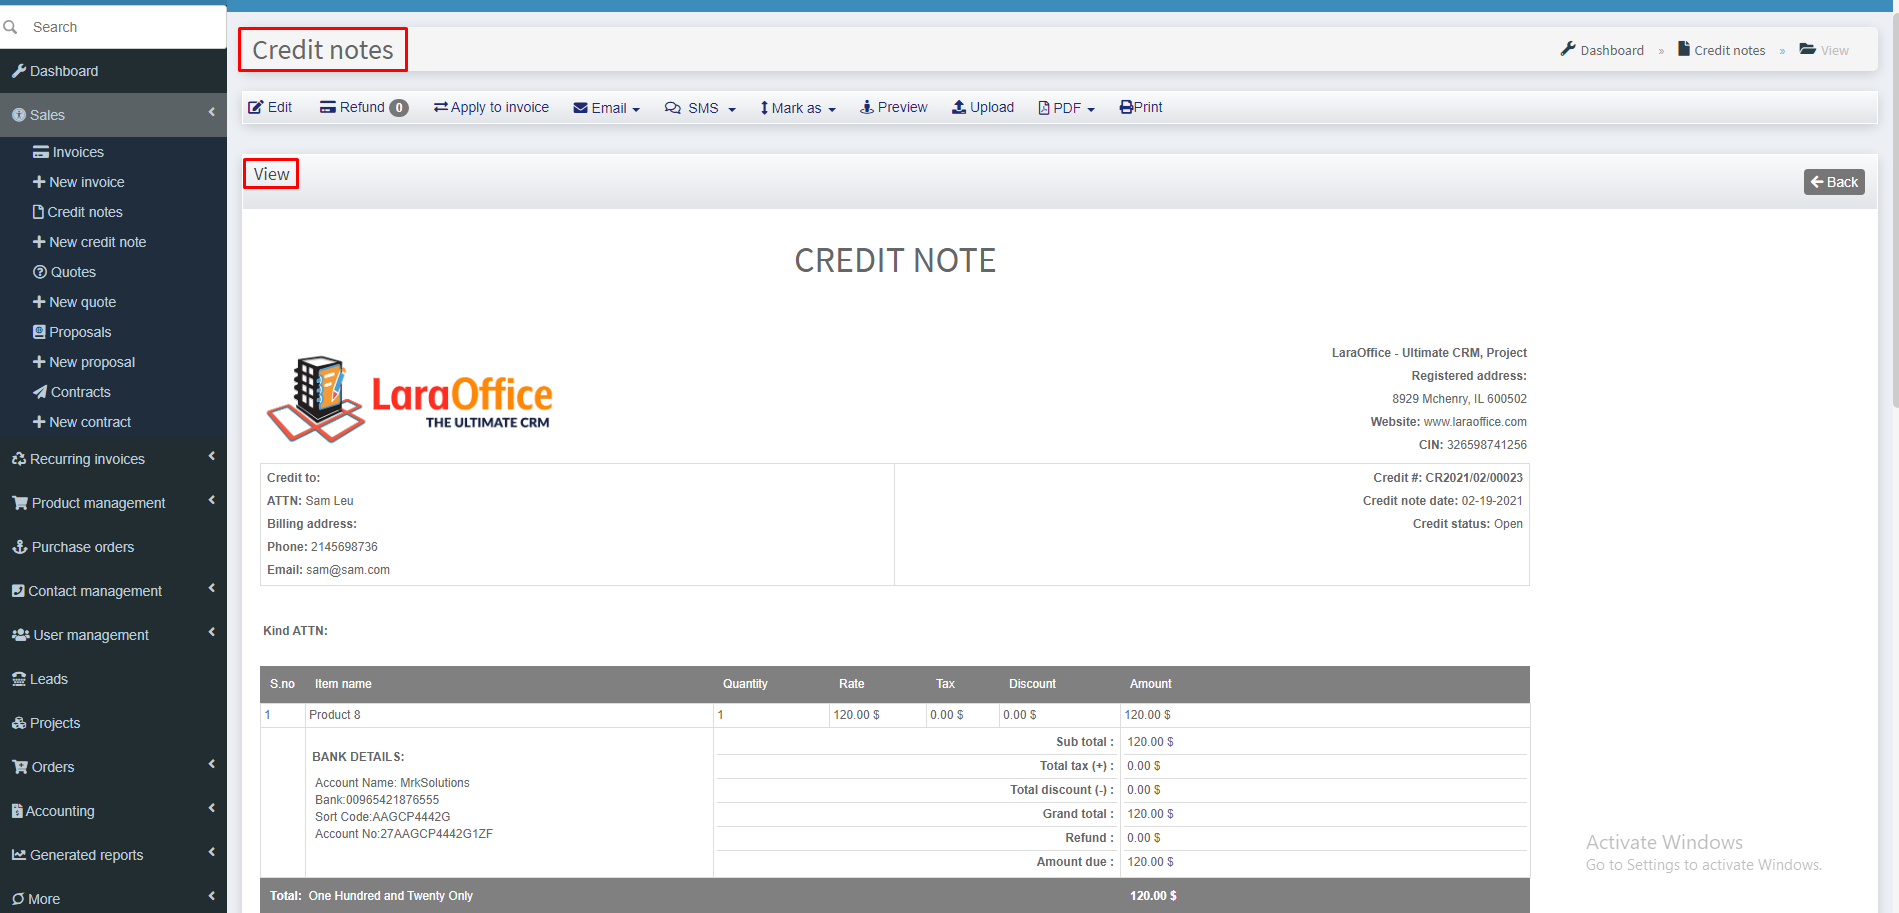
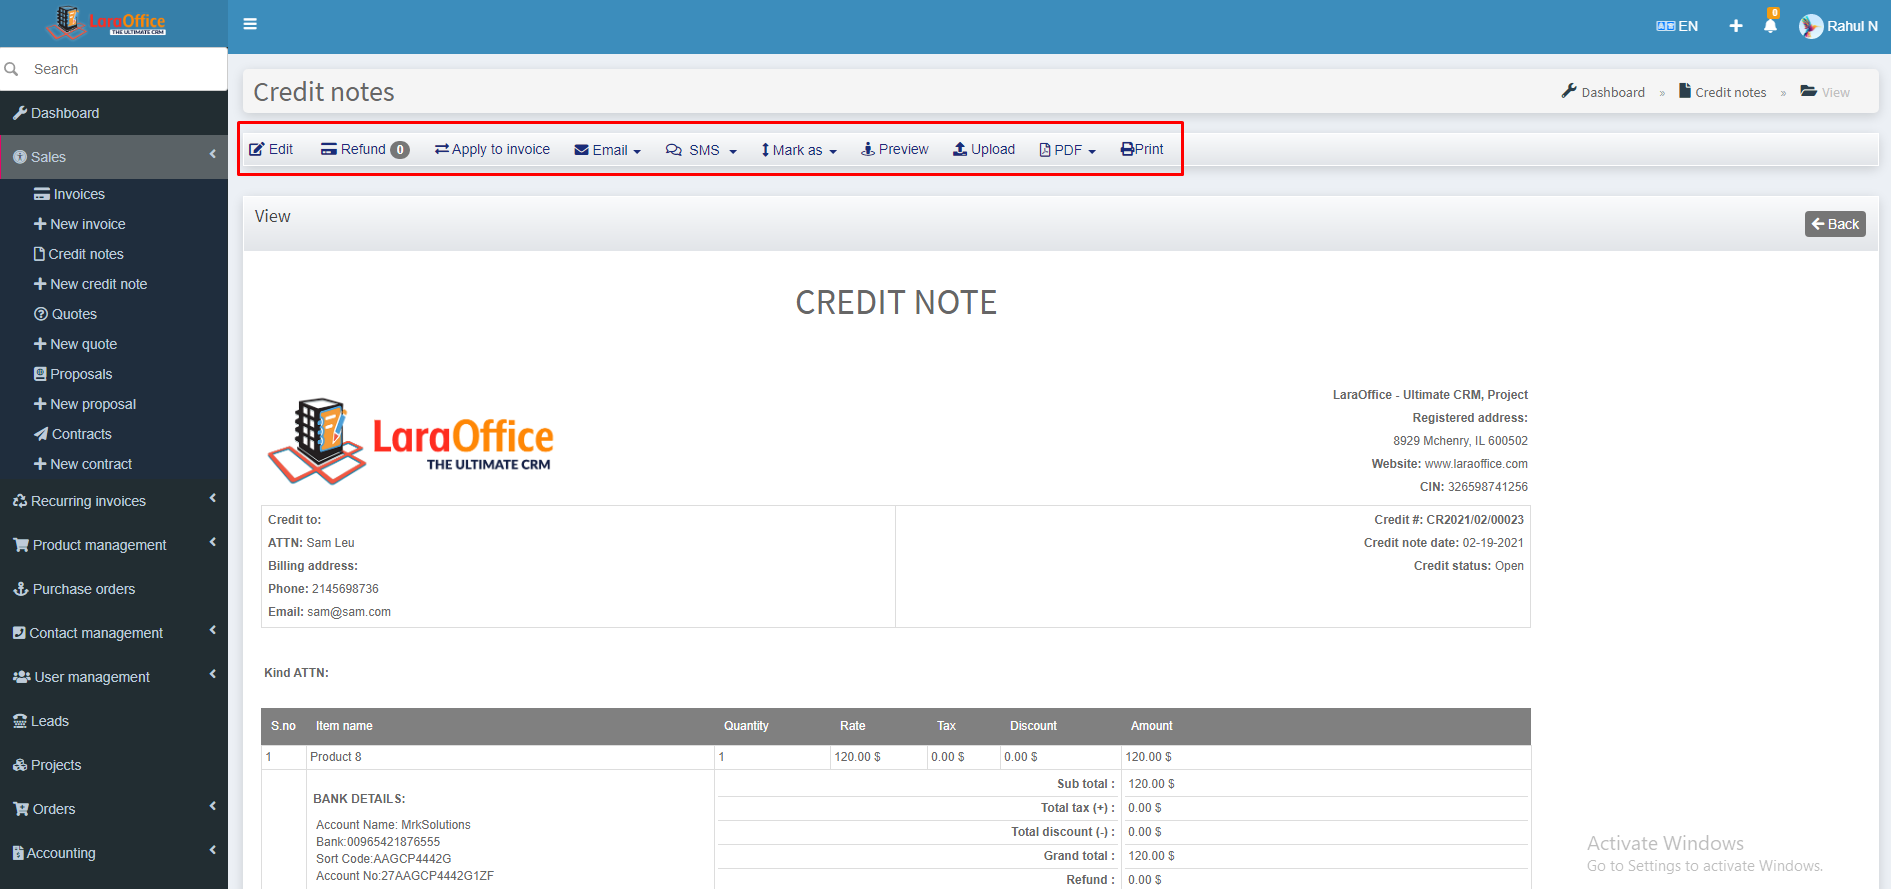 Edit: Edit button allows to edit the content of the credit notes.
 Apply to Invoice: By clicking on this button, credit notes will be applied for the Invoice.